Windshield chips never happen at a good time. A pickup in front of you throws a pebble, you hear the snap, and now you’re staring at a star the size of a pencil eraser. The auto glass shop can take you tomorrow, maybe. The kit at the parts store is twenty bucks and promises a fix in fifteen minutes. I’ve fixed glass on work trucks, family cars, and a couple of stubborn classics. I’ve used the cheap kits, the better ones with proper bridges, and the professional syringes filled with UV resin. Some of them work well, some only look like they did. The truth sits somewhere in the middle.
This isn’t a scare piece about only letting the pros touch your car. It’s a realistic look at when a DIY windshield chip repair makes sense, what it can and cannot do, and the trade-offs you accept. A windshield is not just a window. It’s a structural component bonded to the car, tied into airbags and roof strength. A good repair preserves that. A bad one still might be safe enough day to day, but it can leave you with a creep crack weeks later and a larger bill for auto glass replacement.
What a DIY Kit Actually Does
Most consumer kits tackle small damage with a low-viscosity resin that fills the air space inside the break. The goal is twofold: stop the crack from spreading and improve optical clarity. The resin cures under UV light, either from the sun or a provided lamp. Once cured, you scrape off the excess and polish the surface. Done right, the visual improvement is meaningful, and the crack’s growth is slowed or stopped.
The concept is simple, but implementation is fussy. Every chip has a shape and a personality. A bullseye has concentric circles and a fairly open pocket. A star break has several tight legs radiating from the impact. A combination break mixes both. A long crack, anything past a few inches, is a different creature and rarely a candidate for a true DIY solution.
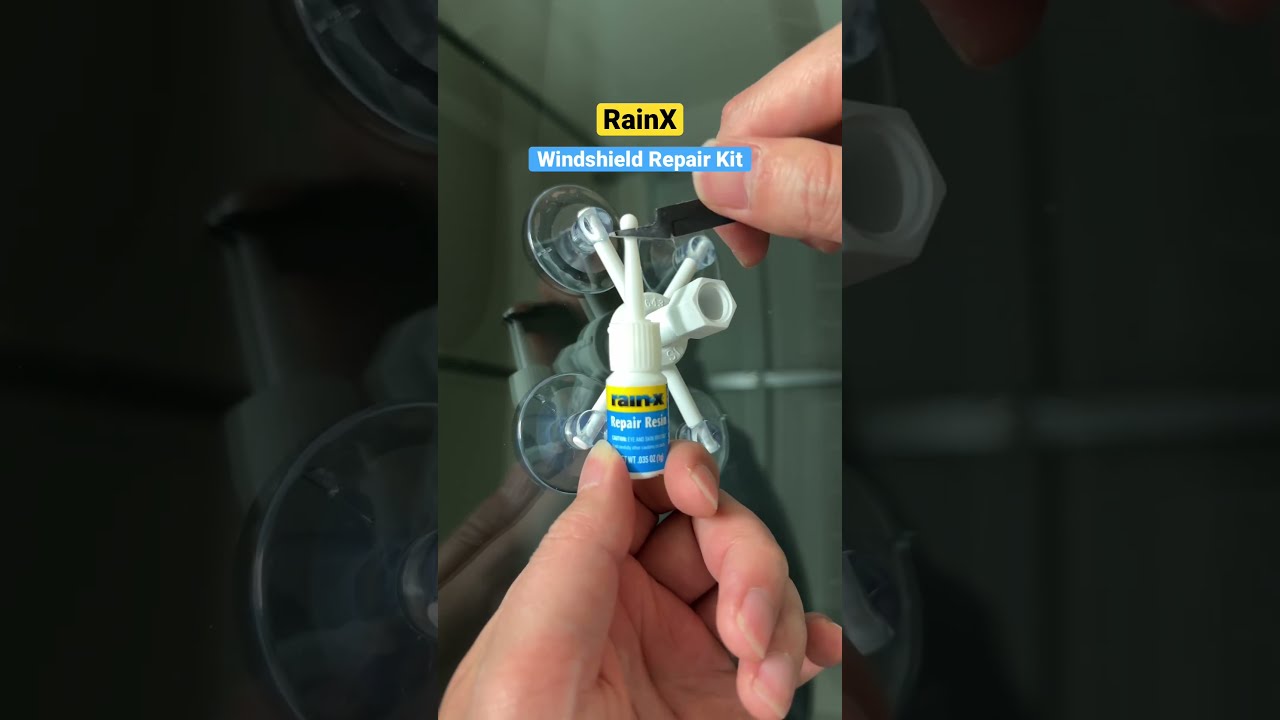
A decent kit comes with a bridge that mounts to the glass with suction cups, a threaded injector, a vial of resin, a curing strip, and a razor blade. The bridge is not a toy. The alignment of the injector over the impact point, the control over pressure and vacuum, and the way you manage microbubbles make the difference between a “good enough” repair and a speckled blur that still wants to creep.
The Limits Worth Respecting
Resin can’t fix missing glass. If a chunk the size of a pea is gone, you can fill the cavity, but the optical distortion will be obvious. Resin also doesn’t bond well to dirt, moisture, or crushed glass dust. Once rainwater or washer fluid has wicked into a break, it never fully disappears without proper drying. That’s why you’ll see technicians pull out a moisture evaporator or a pocket torch used with a surgeon’s touch. Most consumer kits don’t address moisture beyond “park in the sun.”
Temperature matters. On a cold day, a repair that looks complete in the driveway can show ghost legs the next afternoon. In hot weather, the glass expands and stressed cracks can extend while you’re leaning into the hood. The instructions often gloss over this, but the sweet spot is usually between 60 and 80 degrees Fahrenheit, with the windshield shaded to keep heat even.
There’s also the size limit. I tell people to think in terms of a quarter. If the damage, including the outermost leg of a star, fits under a quarter, a kit stands a fair chance. Anything bigger, and a shop with pro tools and resins will outperform you. If a crack is longer than 3 to 4 inches, even a skilled DIYer is rolling dice.
When a Kit Is a Smart Move
I like DIY kits for single, fresh stone chips, especially bullseyes and small stars that haven’t collected dust or water. If the impact point has a clean crater, not a crater clogged with pulverized glass, resin will flow. If you can reach it easily, not jammed under a frit band or behind an inspection sticker, even better. A conservative driver keeping the car for a few years might be satisfied with the optics and the protection from spread.
I’ve seen simple bulls-eyes repaired by a careful owner last the remaining life of the car. I’ve also seen those tiny edge chips that you ignore grow six inches after a hot-to-cold swing in spring weather. Prevention matters. The sooner you seal a clean chip, the more likely you are to avoid auto glass replacement.
When You Need a Pro, or New Glass
Some damage screams for a technician. If you see radiating legs longer than an inch, if the chip sits in the driver’s primary field of view, or if the hit is within two inches of the edge, avoid DIY. Edge tension is fierce and tiny mistakes turn into long, migrating cracks. Modern windshields also carry cameras and sensors for driver assistance. Replacing a windshield with ADAS calibration is not a driveway job. Even repairs near those mounting zones call for caution.
If you already tried a DIY repair and the optics are a mess, a shop may not be able to reverse it. Resin contaminates the break and lowers the success rate of a second attempt. Sometimes they can drill a new port and evacuate some air, but the odds drop. If structural integrity is in question, or if the line of sight distortion is serious, replacement wins. A proper auto glass replacement uses OE-spec or high-quality aftermarket glass, a fresh bead of urethane, and correct cure time so the windshield provides the intended support in a collision.
The Differences Between Kits
Not all kits are equal. The cheapest syringe-only kits rely on you to hold pressure with one hand while watching bubble formation with the other. These can work on small bullseyes but fight you on stars. Mid-grade kits have a screw-in injector and a simple bridge that creates better, steady pressure. The best consumer kits mimic professional bridges, allowing you to alternate between pressure and vacuum. That cycle is how you evacuate trapped air from the microfractures before resin flows in.
The resin itself varies. Thinner resins penetrate better but can shrink more on cure. Thicker resins may leave small voids if local auto glass repair they can’t chase every microchannel. Some kits include a separate pit filler resin for the surface layer. That extra step helps achieve a smooth top finish that resists wiper chatter and dirt.
Curing also differs. Sunlight is fine, but winter light or shaded driveways can leave you guessing. A small UV flashlight in the 365 to 395 nm range can reduce cure times and increase consistency. If your kit doesn’t include one and you plan to do more than one repair over the years, it’s a helpful tool.
What Success Actually Looks Like
People expect invisibility. That’s rarely the outcome, even with professional work. A strong repair is mostly about function, then appearance. After a good windshield chip repair, the dark shadow of the break fades. You might still see a faint ghost or the original impact point. On a clean bullseye, a DIY job can reach 80 to 90 percent optical improvement. On a star break, 50 to 70 percent is more realistic. The difference is visible from the driver’s seat, not from ten inches away under shop lights.
Functional success means no change after temperature swings and door slams. I tell customers to watch the repair for a week. If no legs grow and the spot stays clear, you won. If you see a leg creep, even a quarter inch, it’s time for a professional reattempt or a crack stop at the minimum. Don’t wait. Cracks grow easiest in the first days after a hit.
A Simple, Realistic DIY Workflow
This is not a detailed manual, just the rhythm that produces reliable results without overpromising.
- Keep the chip clean and dry. Cover it with clear tape as soon as it happens to keep out moisture and dirt. Do not wash the windshield right before the repair. Work in shade between 60 and 80 degrees. Clean the glass around the chip with alcohol, not ammonia. Set up the bridge accurately over the impact point. Alternate pressure and vacuum slowly according to the kit instructions. Watch for air bubbles leaving the legs of a star. Be patient, give resin time to flow. Cure under UV, then apply pit filler, cure again, and scrape level with a razor held nearly flat. Finish with a light polish if included.
That sequence covers most small chips. If at any step you cannot evacuate bubbles from the legs, don’t force pressure. Excess pressure can bruise the glass and extend a crack. Step away and consider a shop visit.
The Things Kits Don’t Tell You
There are small techniques professionals use that don’t fit on a trifold instruction sheet. Warming the glass from inside the cabin, not from the outside, gently opens the break without shocking it. Tapping the surface lightly with a plastic tool can encourage stubborn bubbles to move, but ham-handed tapping creates new legs. A micro-drill creates a precise injection point on closed-surface breaks that won’t accept resin. Most DIYers skip drilling because it’s easy to overdo and you only get one shot.
Moisture is a silent enemy. A chip that sat through a rainy weekend can hold water deep inside. A minute with a moisture evaporator at a controlled distance drives it out without cooking the laminate. A hair dryer in the driveway sometimes helps, but it’s harder to control. If you see steam or fogging under the glass, you overdid it.
Another quiet detail is glass movement. Cars flex. If you put the car on a driveway with one wheel up a curb, the windshield might be slightly twisted. That tension changes how a break behaves. Level ground, straight wheels, and normal tire pressure make fine differences that add up to success.
Cost, Time, and Risk
A basic kit runs 10 to 25 dollars. Mid-grade kits that include a proper bridge and better resins run 30 to 60. A one-chip professional repair can cost 80 to 150 depending on region and service type, often discounted for additional chips on the same visit. Mobile service adds convenience and can be worth the premium if the chip sits in a sensitive area.
Time-wise, a careful DIY repair takes 30 to 45 minutes, not counting setup and cleanup. If you’re learning on your own glass, plan for an hour. A shop repair often takes roughly the same time, but you benefit from experience and better tools.
Risk is the wild card. Every repair carries a small chance of the crack growing during the process. A professional carries that risk knowingly and will usually warn you before starting. DIYers sometimes learn the hard way. If the chip is near an edge or you already notice a hairline crack, understand that the repair could tip it over. It’s not common, but it happens.
The Structural Role of Your Windshield
Modern windshields are laminated: two layers of glass bonded to a plastic interlayer. That design keeps shards in place and supports the structure. In many cars, the windshield contributes measurable stiffness to the cabin and helps airbags deploy correctly by reflecting them toward occupants. Damage in the wrong area compromises that function. While a chip seems small, the resin repair is about restoring continuity in that outer glass layer and reducing stress concentration at the break. It’s a localized fix, not a full return to original strength, but it’s meaningful.
If you’re already dealing with pitting, scratches from worn wipers, or multiple chips sprinkled across the driver’s view, there’s a point where repair becomes penny wise, pound foolish. Auto glass replacement is the reset button. Quality matters here. A good shop cleans and primes the pinch weld, applies the right urethane bead, seats the glass precisely, and respects cure time. If you drive away before the urethane reaches safe drive-away strength, you’re gambling with safety systems. Ask for the cure spec. A proper shop will tell you a window like 30 to 120 minutes depending on urethane used and ambient conditions.
Real Expectations for Optics
After a DIY repair, you’ll likely see a small outline under certain lighting, especially at dawn or dusk when light grazes the glass. That doesn’t mean failure. If the shadow doesn’t distract you during normal driving, the repair did its job. If the chip falls smack in the driver’s prime sightline, your tolerance shrinks. This is why some states and inspection agencies take a stricter view of chips and repairs in that zone. Even a good repair can be a technical fail if it’s directly in front of the driver and larger than a set size.
If you drive at night often, be more critical. Headlight glare magnifies defects. A bullseye slightly off to the passenger side that’s invisible by day can throw a small halo at night. That’s not dangerous, but it’s annoying. A professional using higher-grade resin and better vacuum can sometimes reduce that effect compared to a kit.
Common Mistakes I See
Rushing is number one. People set up the injector, crank it down, and cure two minutes later. Resin needs time to creep into microcracks, especially on star legs. Patience pays.
Another mistake is cleaning with the wrong product. Household glass cleaners with ammonia leave residue that repels resin. Stick to alcohol or the cleaner provided.
I also see folks try to fix old damage that’s been filled with wax, Rain‑X, or dirt. You can attempt a repair, but expect lower clarity and a higher chance the crack grows later. Cover chips with a clear sticker or tape right away to keep them clean. Many shops hand these out for free. Keep one in the glove box and you’ll save yourself grief.
Finally, people repair in full sun on hot glass. The resin starts to cure before it flows, trapping bubbles. Shade the windshield or pull into a garage. If the glass is too hot to keep your hand on comfortably, wait.
The Role of Insurance
Many insurers cover windshield chip repair with little or no deductible because it prevents larger claims. This varies, but if your policy includes comprehensive coverage, ask. A zero-dollar professional repair beats a roll of the dice if cost is your main barrier. Don’t assume that auto glass repair means your rates will jump; insurers often treat it as loss prevention. Clarify first.
For replacement, coverage depends on your deductible and state laws. Some states have glass-specific provisions that reduce or eliminate deductibles for windshields. If your car carries ADAS features, confirm the policy accounts for calibration. A cheap replacement that skips calibration is not a bargain.
Matching the Solution to the Car
An old work truck with a basic windshield and a chip the size of a grain of rice is the perfect DIY candidate. A newer SUV with a heated windshield, rain sensor, and lane camera might deserve professional attention even for a small chip. If you lease, check your lease terms. Excessive or poorly repaired chips can trigger turn-in fees. In that case, either get the job done professionally and keep the invoice, or go straight to auto glass replacement if the optics are unacceptable.
Classic cars fall in the middle. Original glass has value to purists, and replacements sometimes distort more than the factory panes. A careful repair can preserve character, but older laminated glass can be more brittle. You can still use a kit, just work slowly and accept that the optics won’t be perfect.
The Bigger Picture: Repair Culture vs Replacement Culture
There’s a sustainability argument for windshield repair. A few milliliters of resin and a small plastic tool keep a pound of laminated glass out of the landfill. On a fleet, routine chip repairs save thousands. Shops know this and many have mobile vans that handle repairs in parking lots while you work. DIY participation fits into this repair-first mindset, but only if you respect the limits. Forcing a marginal DIY fix that later requires replacement wastes both money and material.
Auto glass replacement has improved dramatically. Sealants are better, glass quality is high, and calibration gear is precise. The downside is cost, especially on cars with camera brackets, HUD coatings, or acoustic interlayers. The out-the-door bill can be several hundred to well over a thousand dollars. That’s the stakes on the table when you decide whether your twenty-dollar kit is a smart bet.
A Short Decision Guide
- Fresh chip smaller than a quarter, away from edges and driver’s direct view, kept clean and dry: DIY is reasonable. Star break with multiple legs, or damage near the edge or behind the frit: consider a professional repair first. Long crack more than a few inches, or any damage interfering with ADAS sensors or heating elements: lean toward professional evaluation and likely replacement. If you’re short on time and your insurer covers it, schedule a mobile pro. It’s often the most efficient path to a durable result.
Final Thoughts From the Field
I’ve seen DIY repairs that stood up to five winters and I’ve seen Sunday afternoon jobs turn into Monday morning replacements after a cold snap. The difference isn’t luck. It’s choosing the right candidates, keeping contaminants out, controlling temperature, and working patiently. If you treat a kit like a magic eraser, you’ll be disappointed. If you treat it like a small, technical task that rewards care, you might just save the windshield and a chunk of cash.
Windshield health is maintenance. Small chips want attention, not denial. Whether you choose a confident DIY windshield chip repair or call for auto glass repair from a pro, act early. You’ll protect the glass, your view of the road, and, in many cases, your wallet. And if it turns out you need auto glass replacement, don’t beat yourself up. It’s a chance to reset the clock, get calibration right, and drive off with clear sight and solid structure, which is the point of the glass in the first place.